Charming Free Crochet Pattern Tayo the Little Bus Amigurumi
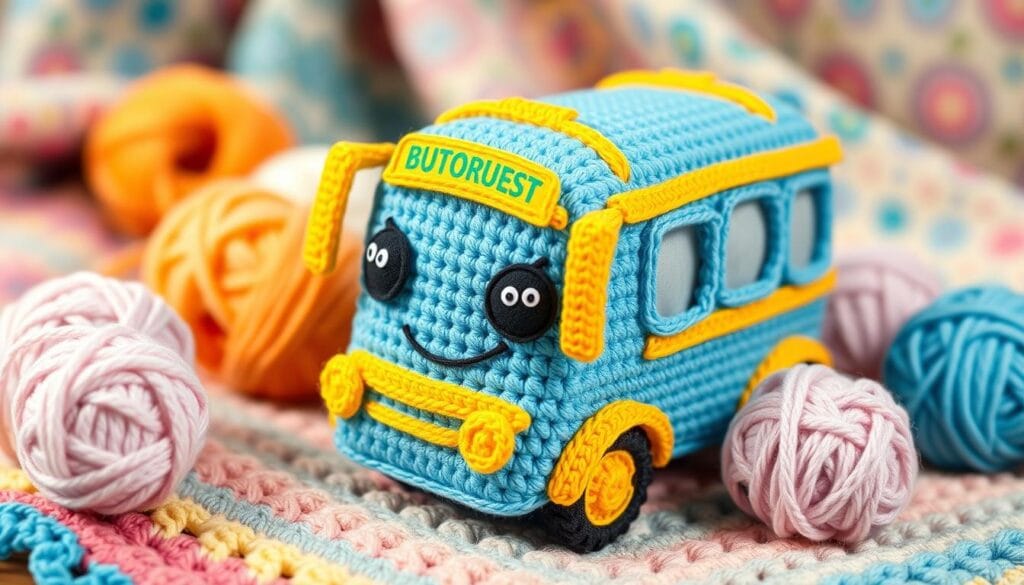
I’ve always loved “Tayo the Little Bus,” a Korean animated series. I wanted to bring the characters to life through crochet. Now, I’m excited to share a free pattern for you to make your own Tayo the Little Bus Amigurumi. It’s a cute plush toy that captures the spirit of this beloved character.
Table of Contents
Introduction to Tayo the Little Bus Amigurumi
Tayo the Little Bus is a favorite Korean animated series worldwide. It was made by Iconix Entertainment. The show is about a group of bus characters learning and having fun every day.
These lovable characters and lessons make it a hit with families. Now, you can get a kids plush of Tayo, the main character.
Origin of Tayo Character
Tayo is a friendly, curious little bus. He loves to explore and is always bright and cheerful. Introduced in 2010, Tayo has won hearts globally, especially among fans of korean cartoon character.
Popularity in Korean Animation
The “Tayo the Little Bus” series is a hit because of its fun stories and colorful animation. It’s a favorite on Korean TV and has grown into books, toys, and handmade craft items like the Tayo Amigurumi.
Why Create Tayo Amigurumi
Making a Tayo Amigurumi lets fans keep a piece of their favorite character close. It’s a special collectible, a cuddly friend, or a unique gift for others. Amigurumi, a Japanese craft, brings out Tayo’s playful and loving side.
Essential Materials and Tools for Crocheting Tayo
To make the adorable Tayo the Little Bus amigurumi, you need some key materials and tools. Whether you’re experienced or new to diy projects, having the right stuff makes creating an amigurumi pattern easier and fun.
Here’s what you’ll need to make your own Tayo the Little Bus amigurumi:
- Yarn in Tayo’s signature colors: blue, white, and black
- Polyester fiberfill or other stuffing material
- Safety eyes in the right size
- Basic sewing tools, like scissors, tapestry needle, and pins
Choose a medium-weight (worsted) acrylic yarn for the best look. It’s soft and has good structure for your Tayo amigurumi. Use a 4.0mm or 4.5mm crochet hook, based on the yarn’s weight.
| Yarn Weight | Recommended Hook Size |
|---|---|
| Worsted Weight | 4.0mm – 4.5mm |
With the right materials and tools, you’re ready to make a cute Tayo the Little Bus amigurumi. It will be full of charm and character, just like the animated bus everyone loves.
Skill Level Requirements and Basic Techniques
Making the adorable Tayo the Little Bus amigurumi needs some crochet know-how. You should know how to do single crochet, increases, and decreases. Also, knowing how to work in continuous rounds and keep stitches tight is key.
Required Crochet Stitches
To make this Tayo amigurumi, you’ll need to know a few stitches. These are:
- Single crochet (sc)
- Increase (inc)
- Decrease (dec)
Knowing these stitches well will help you make a solid, three-dimensional figure. This is what amigurumi is all about.
Understanding Amigurumi Basics
Amigurumi comes from Japan and means crocheting or knitting small, stuffed figures. When making Tayo the Little Bus, it’s important to know some special techniques. These include crocheting in continuous rounds, keeping the tension even, and stuffing well to get the right shape.
Reading Pattern Instructions
It’s very important to read and understand the pattern instructions well. Look out for special terms and stitches that might be new to you. By getting the pattern, you’ll feel more confident and get better results.
| Crochet Stitch | Description |
|---|---|
| Single Crochet (sc) | A basic stitch that creates a tight, dense fabric. This is the primary stitch used in amigurumi construction. |
| Increase (inc) | Crocheting two stitches into the same stitch to create a larger shape or add volume. |
| Decrease (dec) | Crocheting two stitches together to create a smaller shape or reduce volume. |
Step-by-Step Pattern Instructions
Crocheting Tayo the Little Bus amigurumi is a fun project. It brings the beloved character to life with detailed stitches and precise shaping. This amigurumi pattern and crochet instructions will help you every step of the way, whether you’re experienced or just starting out.
- Start by crocheting Tayo’s main body. Use light blue yarn and the single crochet stitch. Work in a continuous spiral to get the rounded bus shape.
- Then, add the wheels. Crochet two circles in black yarn and stuff them firmly. Attach the wheels to the body with extra stitches.
- Make the windows and windshield with white yarn. Place them carefully around the body for a snug fit.
- Use black yarn for Tayo’s eyes and mouth. Position them accurately to show his friendly face.
- Finish the amigurumi by adding any final details. Adjust the shape, secure parts, and weave in loose ends.
Follow these step-by-step instructions to make a charming and accurate Tayo the Little Bus. It will be loved by amigurumi fans and fans of the Korean animation.
“Crocheting Tayo was a joy! The pattern was easy to follow, and the end result was a delightful and lifelike representation of the beloved character.”
Creating Tayo’s Distinctive Features
Making a perfect Tayo the Little Bus amigurumi needs careful detail. This is especially true for his cute face and bus shape. With these skills, you can make the kawaii toys character come alive.
Facial Expression Details
To get Tayo’s happy face, start with the safety eyes. Make sure they’re spaced right and look good together. Then, use embroidery to draw his smile, making it just right.
Bus Body Structure
Getting the bus body right is key for a true Tayo amigurumi. Focus on the shape, making it round and small. Use increases and decreases to get the right shape and size, just like Tayo.
Wheel Assembly Guide
Make sure the wheels are tight to the bus body for a fun toy. Use crochet and smart placement to attach the wheels. This way, Tayo can move around in your character design.
Mastering Tayo’s face, body, and wheels will make a cute kawaii toys amigurumi. With patience and detail, your Tayo the Little Bus will be a lovely addition to any collection.
Color Selection and Yarn Recommendations
When crocheting Tayo the Little Bus amigurumi, picking the right yarn and colors is key. You want to capture Tayo’s bright and playful vibe. This means choosing materials that show off his lively personality.
For Tayo’s main body, bright yellow yarn is a must. Look for a medium to worsted weight yarn that’s soft and smooth. Acrylic yarns are great because they’re tough and easy to clean.
- Suggested Yarn: Vanna’s Choice by Lion Brand in the shade “Lemon”
- Alternative: Caron Simply Soft in “Sunshine”
Tayo’s eyes and mouth need a contrasting color. Black yarn is perfect for these details. It makes Tayo’s face stand out and adds to his charm.
| Yarn Type | Color | Usage |
|---|---|---|
| Worsted Weight Acrylic | Yellow | Main Bus Body |
| Worsted Weight Acrylic | Black | Facial Features |
If you can’t find the exact yellow or black, don’t fret. Try similar colors that still capture Tayo’s essence. The main thing is to pick yarn selection and color choices that make your crocheted Tayo come alive.

Assembly and Finishing Touches
Making your own Tayo the Little Bus amigurumi is very rewarding. But, it’s not just about crocheting. The final steps are key to making it look great. Let’s look at how to put everything together and add the last details to make your Tayo amigurumi stand out.
Securing Parts Together
After crocheting each part of your Tayo amigurumi, it’s time to put them together. Start by lining up the bus body, head, arms, and wheels. Make sure they fit well together.
Use a tapestry needle and yarn that matches to sew the parts together. Try to hide the seams and make the surface smooth. A little fabric glue or hot glue can help keep everything in place.
Adding Final Details
Now that the basic parts are together, it’s time for the finishing touches. Embroider or appliqué the Tayo logo on the bus body. Follow the pattern closely for a great look.
You can also add small details or decorations to make your amigurumi more special. These details can really bring out the character of your Tayo.
By following these steps for amigurumi assembly and finishing techniques, you’ll make a wonderful toy. It will look professional and capture the spirit of Tayo. With care and creativity, your amigurumi will be a treasured item or a great gift.
Tips for Perfect Amigurumi Results
Making a cute amigurumi needs focus and some special tips. As you start crocheting, remember these amigurumi tips and crochet advice. They will help you get results that look like they were made by a pro.
- Maintain Even Tension: It’s important to keep your stitches even. This makes your amigurumi look neat and well-made. Try to keep them tight but not too tight.
- Master Stuffing Techniques: Stuffing your amigurumi right is key for a soft but firm toy. Use a little bit of good-quality polyester fiberfill. Gently fill it up to get the right shape and size.
- Conceal Yarn Ends Neatly: Hiding yarn ends is a skill. You can weave them into the fabric. This makes your amigurumi look clean and neat.
Using these amigurumi tips and crochet advice will help you make amigurumi that are not just cute but also well-made. Enjoy your crocheting!

Customization Options and Creative Variations
Making your own customized amigurumi is all about personalizing the classic Tayo the Little Bus pattern. It’s a great way to create a special gift or show off your creative crochet skills. The options are endless.
Size Modifications
Adjusting the size of your Tayo amigurumi is super fun. Just change the yarn weight and hook size to make it any size you want. You can make a tiny one for a backpack or a big one to be your friend.
Color Alternatives
Get creative with colors! Try green, red, or even a rainbow Tayo instead of the usual blue and yellow. This pattern works with many colors, letting you bring your ideas to life.
Customizing size and color opens up endless creative crochet possibilities. Show off your unique style and make something special that’s all you.
Conclusion
Making a Tayo the Little Bus amigurumi has been a fun adventure. It lets you use your creativity and make this loved character come alive. You followed step-by-step guides and added your own touches, making a special piece that shows Tayo’s charm.
While crocheting, you’ve felt the joy of creating something new. We hope you’ll show off your amigurumi and inspire others to try making their own. There are so many characters from Tayo the Little Bus to try next.
The real joy is in the making, not just the end result. Enjoy the feeling of making something with your hands. Your Tayo amigurumi can be a treasured keepsake or a gift for a child. Either way, it will bring lots of happiness.

