Crochet Pattern: Puffin Rock Amigurumi for Inspired Holidays
As autumn’s colors fade and winter’s cold arrives, handmade crafts bring joy and wonder. For fans of Puffin Rock, this guide lets you create beloved characters through amigurumi. It’s a magical way to brighten your home.
Puffin Rock, by Cartoon Saloon and Dog Ears studios, tells stories of Oona, a young Atlantic Puffin. You can make your own Puffin Rock-inspired amigurumi toys. They’re great for decorating or as unique gifts.
Table of Contents
Introduction to Puffin Rock Amigurumi Crafting
Discover the fun of making amigurumi toys from “Puffin Rock.” Amigurumi is a Japanese art of crocheting small, stuffed yarn creatures. It’s a great way to make these cute seabirds come to life. This guide is for both seasoned crafters and beginners who want to make a puffin plushie.
This project combines the show’s charm with the joy of amigurumi. Your finished children’s toys will make kids happy and become special keepsakes for adults who love crochet.
“Amigurumi allows you to breathe life into your favorite characters, creating a tangible connection that sparks imagination and joy.”
Next, you’ll learn about the materials, techniques, and steps to make your Puffin Rock amigurumi. Whether it’s for a child or a personal challenge, this guide will help you create a lovable, cuddly friend inspired by Puffin Rock.
Essential Materials and Tools for Your Puffin Project
To make your Puffin Rock amigurumi, you’ll need some key items. First, get worsted weight yarn in Puffin colors like black, white, and orange. You’ll need a 3.5mm (E) hook for the body and a 2.75mm (C) hook for details.
Recommended Yarn Types and Colors
For a real Puffin Rock look, pick high-quality worsted weight yarn. Use:
- Black yarn for the body and wings
- Orange yarn for the beak and feet
Required Crochet Hook Sizes
Here are the crochet hook sizes you’ll need:
- 3.5mm (E) hook for the main body
- 2.75mm (C) hook for smaller details, like the beak and feet
Additional Supplies Checklist
You’ll also need other things to finish your Puffin Rock amigurumi:
- Polyester fiberfill for stuffing
- Safety eyes in a size right for your project
- A yarn needle for putting it together and weaving in ends
With these materials and tools, you’re ready to make your own Puffin Rock friend. Make sure to use top-notch crochet kits and puffin rock merchandise for the best outcome.
Understanding Amigurumi Basics for Beginners
Amigurumi is a Japanese art of crocheting small, stuffed toy figures. It has become very popular among crochet fans and those who love amigurumi toys. If you’re new to this world, don’t worry! Learning the basics of amigurumi is key to making your own puffin rock character.
Amigurumi patterns mostly use the single crochet stitch. They work in continuous rounds to make a smooth shape. The magic ring is a must-know technique for starting your project with a strong center. Also, knowing how to increase and decrease stitches is important for shaping your puffin’s features, like its head and body.
Working in spiral rounds is another key part of amigurumi. This method keeps your work flowing smoothly. It helps your puffin look three-dimensional and charming.
“Amigurumi is a captivating craft that allows you to breathe life into your own unique creations.”
By learning these basic techniques, you’ll be ready to make a puffin rock amigurumi. It will look great and be well-made. So, pick up your crochet hook, explore the world of amigurumi, and let your creativity shine!
Step-by-Step Puffin Rock Pattern Instructions
Making the puffin rock amigurumi is a fun journey. It mixes crochet skills with a cute charm. Start with the body, using black yarn from the bottom up. Then, shape the puffin’s head by decreasing stitches to get the right shape.
Creating the Body Structure
Begin with the body, using black yarn from the bottom. Increase stitches for a rounded shape. Then, decrease stitches for a tapered neck. Keep your stitches even and consistent for a solid base.
Shaping the Distinctive Puffin Head
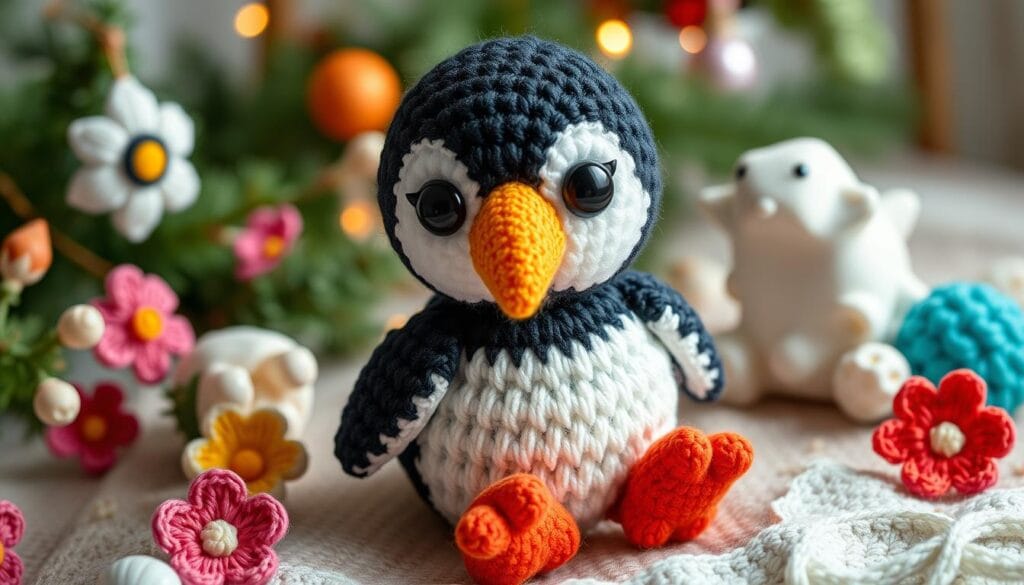
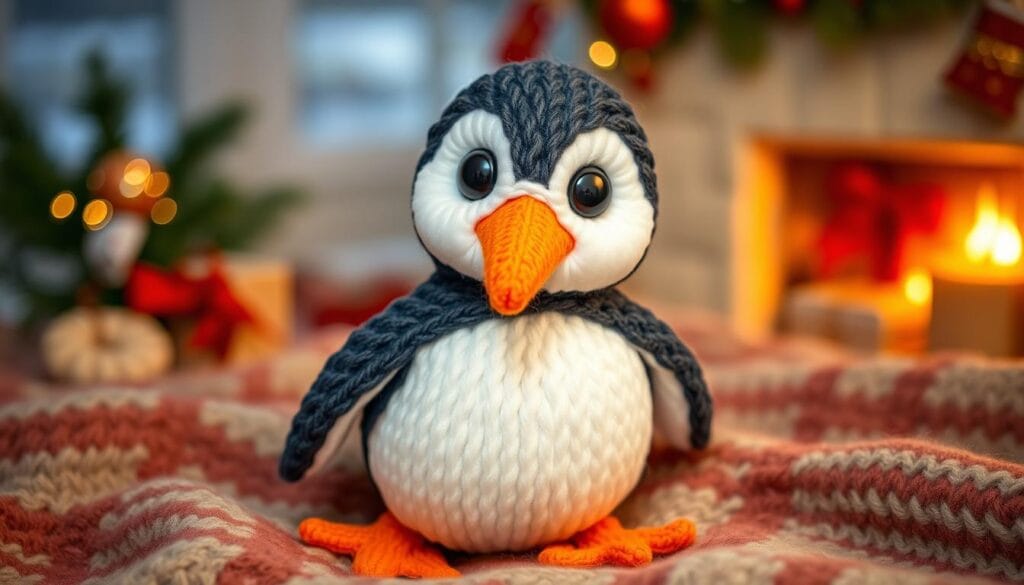
The puffin’s head is key to its charm. Use black yarn to shape the head by decreasing stitches. This will create the puffin’s rounded silhouette and pointed beak. Make sure the head looks like a puffin’s.
Wings and Feet Assembly Guide
Crochet separate wings and feet and attach them to the body. Use white or gray for the wings to show off the puffin’s color. The feet should have a webbed design in black and yellow or orange.
Now, your puffin rock amigurumi is coming together. Add the beak and facial features for the final touches. Next, learn how to change colors and use special stitches to make your project even better.

Mastering Color Changes and Special Stitches
Making a perfect puffin amigurumi is more than basic crochet skills. You need to master color changes and special stitches. These add depth, texture, and character to your crochet patterns.
The puffin’s black and white feathers are key to its look. Changing colors smoothly is essential. Learning “color pooling” ensures a seamless transition, making the puffin’s markings pop.
Special stitches like the “popcorn stitch” and “puff stitch” also play a big role. They add texture to the wings and fluff to the body. These stitches bring the puffin to life and make it visually appealing.
| Stitch | Purpose | Difficulty Level |
|---|---|---|
| Color Pooling | Seamless color transitions | Intermediate |
| Popcorn Stitch | Textured wing effect | Intermediate |
| Puff Stitch | Fluffier body appearance | Intermediate |
Mastering these techniques lets you create a stunning puffin amigurumi. It shows off your crochet skills and attention to detail. Embrace the challenge, try new things, and let your creativity shine. Bring this charming seabird to life with your crochet patterns and handmade crafts.
Adding Character Details and Facial Features
Make your puffin plushie come alive with the right eyes and beak. Start by placing the safety eyes or embroidering them where you want. Make sure the shape and position are just right for a lively look. Then, use bright orange yarn to make the beak, shaping it to match the puffin’s special look.
Eye Placement Techniques
When adding eyes to your puffin, keep these tips in mind:
- Safety Eyes: Make sure they’re on evenly and at the right height for a natural look.
- Embroidered Eyes: Use black yarn to embroider the eyes, adding depth to your puffin’s face.
- Placement: Place the eyes a bit higher on the head, angled outwards, to capture the puffin’s unique stare.
Beak Construction Methods
The puffin’s bright orange beak is key to its charm. Here’s how to make it:
- Choose a vibrant orange yarn that matches the puffin’s bright color.
- Crochet the beak into a triangular shape, tapering to a point to match the puffin’s beak.
- Securely attach the beak to the puffin’s face, making sure it’s in the right spot and stays put.
With the eyes and beak done, add small details like eyebrows or blush to complete your puffin. These final touches will make your puffin plushie a standout, perfect for any child.

Tips for Stuffing and Assembly
Making beautiful amigurumi toys and handmade crafts needs careful attention. Stuffing and assembly are crucial steps. Here are some tips to help your puffin rock turn out right:
- Choose high-quality polyester fiberfill for stuffing. Add it a little at a time to fill evenly.
- Stuff the body and head well, but don’t overdo it. Too much stuffing can make it look wrong.
- When putting together parts like wings and feet, use a yarn needle and matching thread. This makes sure everything fits together well.
| Stuffing Technique | Recommended Supplies | Benefits |
|---|---|---|
| Gradual Stuffing | Polyester Fiberfill | Ensures even distribution and firm shaping |
| Secure Assembly | Yarn Needle, Matching Thread | Creates a durable and well-integrated amigurumi |
By using these tips, you can make your amigurumi toys and handmade crafts look professional. You’ll capture the puffin rock’s charm with great care.
“Attention to detail is key when crafting the perfect amigurumi. The stuffing and assembly process truly brings your creation to life.”
Customization Options for Your Puffin Rock Characters
Exploring the world of crocheting Puffin Rock characters opens up endless customization options. You can make a snug oona and baba plush or a playful penguin amigurumi. These tips will guide you in making your puffin projects truly unique.
Size Modifications Guide
To change the size of your puffins, just adjust your crochet hook or yarn. Smaller hooks and finer yarns make for smaller puffins. Bigger hooks and thicker yarns create larger, chunkier ones. Try different combinations to find the size you want.
Character-Specific Variations
Customize your amigurumi to match your favorite Puffin Rock characters. Use bright blue and yellow for Oona, and soft, muted tones for Baba. For Mossy, try shades of green and add plant-like textures.
| Character | Color Palette | Distinctive Features |
|---|---|---|
| Oona | Blue, Yellow | Bright, cheerful colors |
| Baba | Muted tones | Soft, cuddly texture |
| Mossy | Shades of Green | Plant-inspired design |
With these tips, you can make a special collection of oona and baba plush and penguin amigurumi. Your creations will show off your unique style and creativity.
Troubleshooting Common Amigurumi Challenges
Creating crochet patterns and amigurumi toys is fun and rewarding. But, you might face some challenges. Don’t worry, with a bit of troubleshooting and tips, you can solve these problems and get a great result.
Uneven Stitches and Gaps in the Fabric
Uneven stitches and gaps are common in amigurumi. They can be due to uneven tension or losing count. To fix this, keep your tension even and watch your stitch count. Use stitch markers to help you stay on track and get a tighter finish.
Misshapen Parts and Oddly Angled Limbs
Parts of your amigurumi might not turn out right, leading to misshapen or odd limbs. This can be from bad stuffing or shaping. To fix it, stuff evenly and avoid over-stuffing. Try different shaping methods, like wire or pipe cleaners, to get the right shape.
Frustrated with Embellishments and Facial Features
Adding details like embellishments and facial features can be tricky. If you’re struggling, don’t get discouraged. Take your time, follow the pattern, and practice on scraps first. Being patient and detailed will help you achieve a polished puffin rock amigurumi.
Dealing with problems is part of making crochet and amigurumi. By solving common issues, you’ll make a beautiful puffin rock.
| Common Amigurumi Challenges | Solutions |
|---|---|
| Uneven Stitches and Gaps in the Fabric |
|
| Misshapen Parts and Oddly Angled Limbs |
|
| Frustrated with Embellishments and Facial Features |
|
Care Instructions for Your Finished Puffin
Congratulations on making your adorable puffin plushie! To keep it looking great, follow these easy care tips:
Gentle Cleaning
When cleaning your puffin plushie, use a mild detergent for hand washing. Don’t soak the whole toy in water. This can make the stuffing wet and change its shape.
Air Drying
After washing, let your puffin plushie air dry flat. Don’t use a dryer. The heat can harm the soft fibers and mess up its shape.
Proper Storage
- Keep your puffin plushie in a cool, dry spot, away from sunlight or heat.
- Store it in a breathable bag or box to stop dust from making it look dull.
- Don’t squish the puffin plushie when storing it. This can make the stuffing lose its fluffiness.
By following these care tips, your puffin plushie will stay a beloved children’s toy for a long time.
Conclusion
Creating your own puffin rock amigurumi is a rewarding and joyful journey. It lets you bring these delightful characters to life. You’ve joined a rich tradition of textile arts and cherished childhood memories.
Whether it’s for decoration, a gift, or your collection, be proud of your work. Each stitch shows your skills and personal style. Your creation is a testament to your hard work.
Keep exploring the world of puffin rock amigurumi and share your work. Inspire others and discover new characters. Crafting personalized gifts or collectibles is truly special.

