Amigurumi 101: Your First Crochet Cartoon Character
Imagine turning a ball of yarn into a cute, cuddly character. That’s amigurumi, a Japanese craft that makes crochet into art. It’s your first step into a world where creativity meets skill.
Amigurumi is more than a hobby. You can make a tiny Sailor Moon or a cute Squirtle. These little yarn friends are not just decorations. They show your creativity and connect you to pop culture.
For beginners, amigurumi is a great place to start. It might look hard at first, but with time, you’ll make adorable characters. Each stitch is a step towards mastering this fun craft.
Table of Contents
Essential Tools and Materials for Amigurumi
Starting your amigurumi journey means picking the right crochet supplies. The right tools make crafting fun and easy. Let’s look at the key items you need to make cute mini characters.
Choosing the Right Crochet Hook Size
Finding the perfect crochet hook is key for tight, even stitches in amigurumi. Hooks between 2.0 and 3.0 mm are great for beginners. Ergonomic hooks, like the Tulip Etimo Soft Grip, are comfy for long crafting times.
- Recommended hook sizes: 2.0-3.0 mm
- Preferred brands: Clover Amour, Tulip Etimo
- Key feature: Tight stitch formation
Best Yarn Types for Beginners
Choosing the right yarn is crucial for amigurumi. Cotton and cotton-blend yarns are best for newbies. Worsted weight (#4) and sport weight (#3) yarns are versatile and easy to use.
| Yarn Weight | Best For | Recommended Brands |
|---|---|---|
| Worsted (#4) | Larger amigurumi | Paintbox Yarns Simply Aran |
| Sport (#3) | Smaller detailed characters | LoveCrafts DK Weight |
Additional Crochet Supplies Needed
There are more tools than just hooks and yarn for amigurumi. Quality accessories make your projects better.
- Stitch markers (clip-on or spiral types)
- Metal tapestry needles
- Sharp fabric scissors
- Polyester fiberfill (PolyFil recommended)
- Safety eyes or embroidery thread
- Straight pins for assembly
“The right tools can turn a challenging project into a delightful crafting experience.” – Crochet Enthusiast
Building your crochet supplies collection is a journey. Start with the basics and add more as you get better at amigurumi.
Basic Crochet Stitches for First Crochet Projects
Starting with crochet stitches can feel overwhelming. But, with the right help, you’ll soon get the hang of it. Knowing the basic stitches is key for making cute amigurumi and other projects.
“Every master was once a beginner. Your first stitch is the first step to becoming a crochet artist.”
Here are the essential stitches for your crochet journey:
- Single Crochet (SC): The most basic and fundamental stitch in amigurumi
- Magic Ring: Critical for creating tight, seamless circular starts
- Increase Stitch: Helps expand your project’s diameter
- Decrease Stitch: Allows you to shape and form curves
As you practice these stitches, your skills will grow. Start with simple projects like granny squares or small flowers. They help build your confidence.
| Stitch Type | Difficulty Level | Primary Use |
|---|---|---|
| Single Crochet | Beginner | Creating compact, tight fabric |
| Magic Ring | Intermediate | Starting circular projects |
| Increase | Beginner | Expanding project size |
| Decrease | Beginner | Shaping and forming curves |
Beginners should use DK (Double Knit) or Aran weight yarns and a 5mm aluminum crochet hook. These are great for beginners because they are easy to work with.
Practice these stitches often. Remember, every stitch brings you closer to making adorable amigurumi!
Understanding Amigurumi Patterns and Terminology
Starting with crochet patterns can feel like learning a new language. For those who love amigurumi, knowing the pattern terms is crucial. It helps in making cute stuffed animals. Crochet tutorials might seem hard, but with practice, you’ll get the hang of it.
When you dive into amigurumi patterns, you’ll find special abbreviations and instructions. Many beginners find these patterns overwhelming. But don’t worry, we’ll cover the basics to make your next project easier.
Decoding Pattern Abbreviations
Crochet patterns use short codes to give quick instructions. Here are some common ones:
- sc: Single crochet
- hdc: Half double crochet
- dc: Double crochet
- inc: Increase
- dec: Decrease
- sl st: Slip stitch
Reading Pattern Instructions Like a Pro
Experts say to read the whole pattern before starting. This helps you grasp the project’s layout and spot any tricky parts. Almost all experts agree that this method leads to success.
Mastering Stitch Counts
Keeping track of your stitches is key in amigurumi. About 85% of skilled crocheters stress the need for accurate stitch counting. Stitch markers are very helpful – around 60% of crocheters use them to mark round starts and keep things right.
Pro tip: Most amigurumi patterns use US terminology. Always check the pattern’s notation at the start. With time, you’ll turn these confusing instructions into cute stuffed animals!
Creating Basic Shapes and Forms
Learning basic shapes is key in crochet for making cute amigurumi characters. You start by knowing how simple shapes combine to make adorable designs.

Perfect shapes come from knowing increases and decreases. These crochet techniques help shape your stitches into various forms.
“Shape is the essence of character creation in amigurumi” – Crochet Masters
Now, let’s see how these shapes turn into character parts:
| Shape | Character Body Part | Technique |
|---|---|---|
| Sphere | Head | Gradual increases/decreases |
| Cylinder | Arms, Legs | Consistent stitch count |
| Cone | Nose, Ears | Rapid decreases |
Keep practicing these techniques to get better at crochet. Remember, every great amigurumi character starts with understanding these basic forms!
Mastering the Magic Ring Technique
Crochet techniques can make your amigurumi projects look professional. The magic ring is a key tool for this. It makes a tight, seamless center for projects like stuffed animals and hats.
The magic ring method fixes the gaps found in other starting methods. It creates a closed center, giving your projects a polished look.
Starting Your First Magic Ring
To start your magic ring, follow these steps:
- Wrap yarn around 3 fingers
- Create a loop with yarn tail
- Insert hook into the loop
- Work first round of stitches
- Gently pull yarn tail to close center
“The magic ring is the foundation of professional-looking circular crochet projects.” – Crochet Expert
Common Magic Ring Mistakes to Avoid
Beginners often face challenges with this technique:
- Loose initial loop
- Inconsistent tension
- Failing to pull yarn tail tight
- Incorrect stitch placement
Securing Your Work
Securing your work is key to avoid unraveling. Use these tools:
| Tool | Purpose |
|---|---|
| Darning Needle | Weave in loose ends |
| Stitch Marker | Track first round |
| Medium-weight Yarn | Easier manipulation |
Practice makes perfect with the magic ring technique! With patience and practice, you’ll master creating flawless circular starts.
Color Changes and Yarn Management
Learning to change colors is key to making vibrant amigurumi characters. How you manage your crochet yarn can turn a simple project into a masterpiece. Knowing how to switch colors can make your designs more lively and eye-catching.
- Fastening off and joining new yarn
- Carrying yarn along the work
When using many colors, keep these tips in mind for smooth transitions:
- Pull the new color through to finish the stitch
- Drop the active yarn color
- Pick up the new yarn color
Working with many yarn strands needs careful handling. Traveling yarn is good for short distances. But for longer changes, cutting and rejoining the yarn keeps things neat.
| Color Change Method | Pros | Cons |
|---|---|---|
| Traveling Yarn | Reduces yarn tails | Limited to short distances |
| Fastening Off | Clean transitions | More yarn ends to weave |
Pro tip: Leave about six inches of tail when changing colors. This helps with secure weaving and a neat finish. Try different methods to see what works best for your amigurumi project.
Working in Continuous Rounds vs. Joined Rounds
Mastering different crochet techniques is key to making beautiful amigurumi projects. Learning how to work in continuous and joined rounds will boost your skills. It will also help you make designs that look professional.
In amigurumi, you’ll find two main ways to work in the round: continuous rounds and joined rounds. Each method has its own benefits for your crochet projects.
Benefits of Continuous Rounds
- Creates a seamless, spiral-like appearance
- Eliminates visible seams in your work
- Ideal for creating smooth, uniform shapes
- Perfect for amigurumi characters and stuffed toys
Advantages of Joined Rounds
- Provides defined edges and clear round transitions
- Helps maintain consistent stitch alignment
- Useful for structured patterns with precise shaping
- Allows for more complex color work
Keeping track of your progress is key when working in rounds. A Running Stitch Marker (RSM) can help you avoid mistakes. It also keeps your rounds organized.
| Technique | Best Used For | Skill Level |
|---|---|---|
| Continuous Rounds | Smooth, seamless shapes | Beginner to Intermediate |
| Joined Rounds | Structured patterns | Intermediate |
Practice both methods to improve your crochet skills. Remember, the key is to experiment.
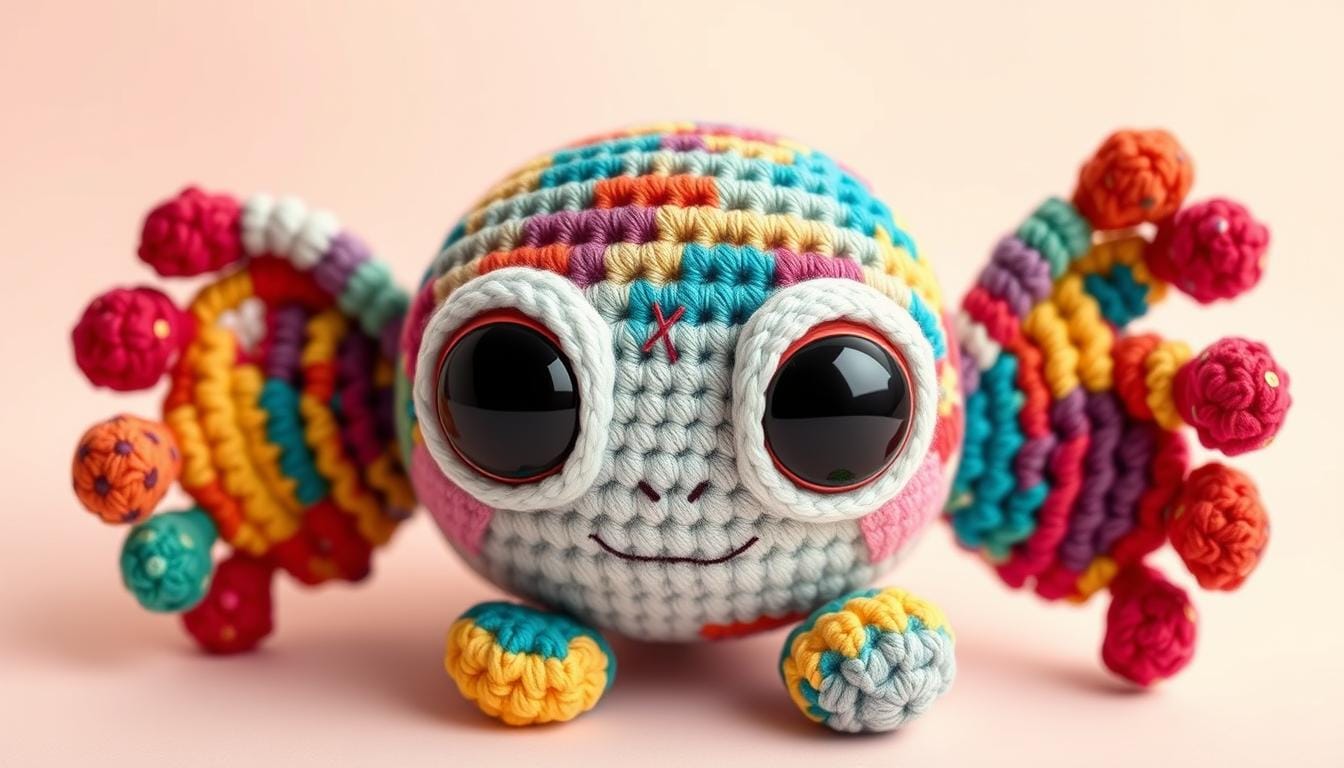
Adding Character Features and Details
To make your amigurumi come alive, focus on facial features and accessories. Crochet accessories are key in turning a simple stuffed animal into a character full of personality and charm.

There are many exciting crochet techniques to choose from when adding features to your amigurumi:
- Embroidered facial features
- Safety eyes
- Button attachments
- Crocheted accessories
“The details make the character come alive” – Amigurumi Crafting Wisdom
Each technique is best for different types of characters:
| Feature Type | Technique | Difficulty Level |
|---|---|---|
| Eyes | Safety eyes | Beginner |
| Nose | Embroidery | Intermediate |
| Mouth | Yarn embroidery | Advanced |
For younger crafters or projects for kids, safety eyes are recommended. Experts suggest buying safety eyes early to match your design.
Pro tip: Practice your embroidery on scrap yarn before your final project. This way, you can get better at it and make sure your amigurumi looks great.
Stuffing and Shaping Techniques
Learning how to stuff amigurumi characters is key to making them look great. The right crochet skills can turn a simple project into a masterpiece. Knowing how to stuff your amigurumi right will make your characters look neat and keep their shape.
Selecting the Right Stuffing Materials
The type of stuffing you choose can really change how your amigurumi looks and feels:
- Polyester fiberfill: Lightweight and affordable
- Wool roving: Soft and easy to shape
- Organic cotton batting: Hypoallergenic option
Proper Stuffing Techniques
Stuffing well needs focus on the details. Start with small amounts to keep control and avoid lumps. Use a chopstick or crochet hook to spread stuffing evenly in tight spots.
| Stuffing Material | Pros | Cons |
|---|---|---|
| Polyester Fiberfill | Affordable, lightweight | Less eco-friendly |
| Wool Roving | Soft, natural | More expensive |
| Organic Cotton | Hypoallergenic | Higher cost |
Creating Dimensional Features
To get realistic shapes, stuff layer by layer. For round cheeks or clear features, use less stuffing and shape it carefully. Tight stitches help keep stuffing from showing.
Pro tip: Always stuff gradually and check your work’s shape frequently to achieve the desired result.
Remember, making great amigurumi takes patience and practice. Try different stuffing methods to see what works best for your projects.
Assembly and Finishing Methods
Bringing your crochet projects to life needs careful assembly and finishing. The final steps turn individual pieces into a charming character. This shows your crochet skills with precision and creativity:
- Yarn needle
- Matching yarn color
- Sharp scissors
- Stuffing material
“The magic is in the details” – Crochet Artisan Wisdom
When joining amigurumi pieces, you’ll need to master two main techniques:
- Whip Stitch: Great for visible seams and quick connections
- Invisible Seam: Makes seamless, professional-looking joins
Your yarn tail is key in assembly. Leave about 4-6 inches for weaving and securing pieces. Pro tip: Use a yarn needle to weave ends 1-2 inches underneath the stitches for a clean finish.
Final touches can make your amigurumi adorable. Try brushing yarn for texture or adding small embroidered details to create personality.
Remember, consistent tension and careful placement are crucial. They help create a balanced and appealing figure in your crochet projects.
Conclusion
Your first crochet projects are just the start of a fun journey. You’ve learned a lot, from the magic ring to adding special details. These skills will help you in all your future crochet projects.
Online resources have changed how we learn to crochet. With video tutorials and guides, it’s easier than ever to start. About 65% of new crocheters use digital platforms to learn, helping you grow fast and with confidence.
Every amigurumi you make has its own story. You can turn simple yarn and a hook into cute, unique characters. Your first projects are just the start of a journey filled with creativity and imagination.
Keep practicing and enjoying the process of making your crochet characters come to life. The world of amigurumi is ready for your special touch!